MetaMask: A Detailed Guide for Beginners

One of the factors that initially held back the development of the crypto industry was the lack of convenient and secure wallets for storing digital assets. MetaMask managed to solve this problem in 2016, becoming one of the first and most popular non-custodial solutions that allow users to store tokens and cryptocurrencies across dozens of EVM-compatible networks.
In this article, we will explore what MetaMask is, what features it offers to users, and how to create a cryptocurrency wallet using this client.
What is MetaMask?
MetaMask is a popular software cryptocurrency wallet available as a browser extension and a mobile app, which allows users to store, send, and receive digital assets. The mobile client also provides access to decentralized applications (dApps) through its integrated browser.
The first version of the wallet was introduced in 2016 by ConsenSys, a company developing infrastructure solutions and products for Ethereum and compatible networks. In 2019, ConsenSys also launched a mobile app for iOS and Android, complementing the desktop browser extension.
How to Install MetaMask
How to Install MetaMask
MetaMask is a multiplatform solution that can be used simultaneously on both PCs and mobile devices. For desktop, you need to download the official extension for Google Chrome or Mozilla Firefox. For smartphones, the app is available on the Play Market or App Store.
The interface of the mobile and desktop versions differs slightly, but the process of creating and setting up a wallet is very similar. For this demonstration, we’ll use the browser extension. So, after downloading the client to generate a new address:
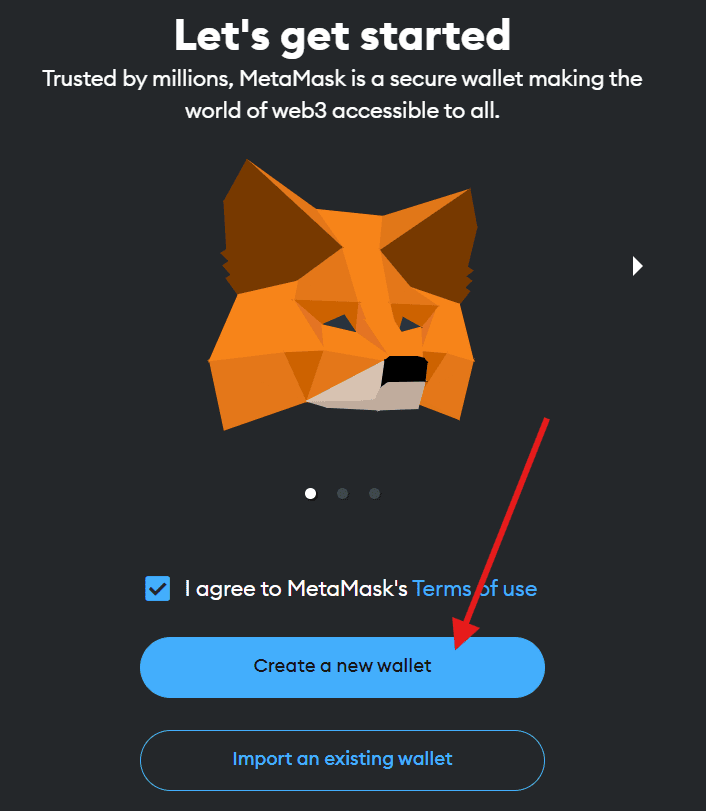
- Choose between importing an existing wallet or creating a new one. To generate a new address, click Create a new wallet.
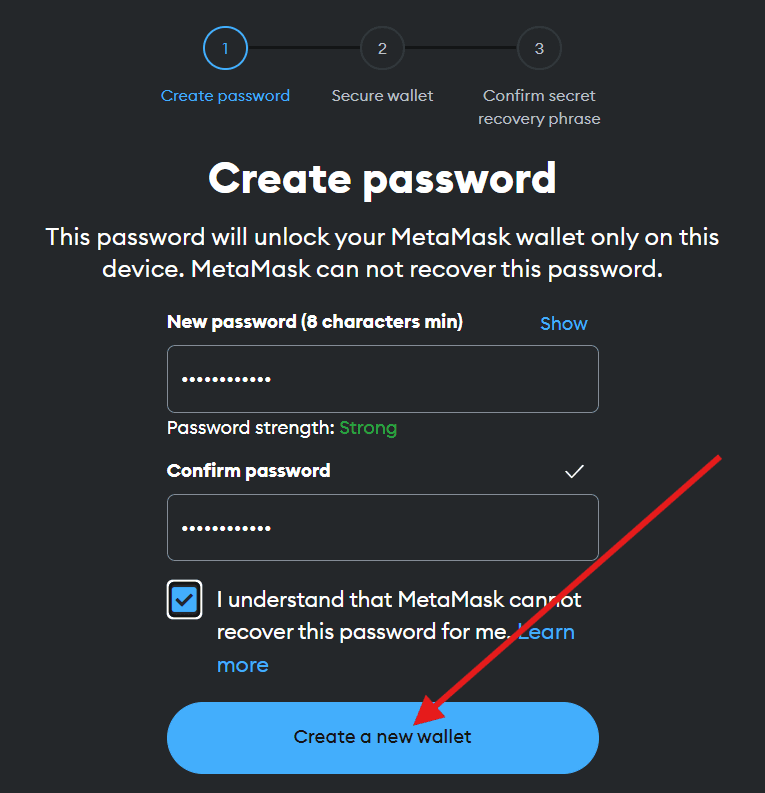
- Set and confirm a password to log into the extension or app. Keep in mind that this is only a local security measure, and it does not protect the owner from the leakage of private keys or the seed phrase.
- Secure access to your wallet with the seed phrase. To do this, click Secure my wallet.
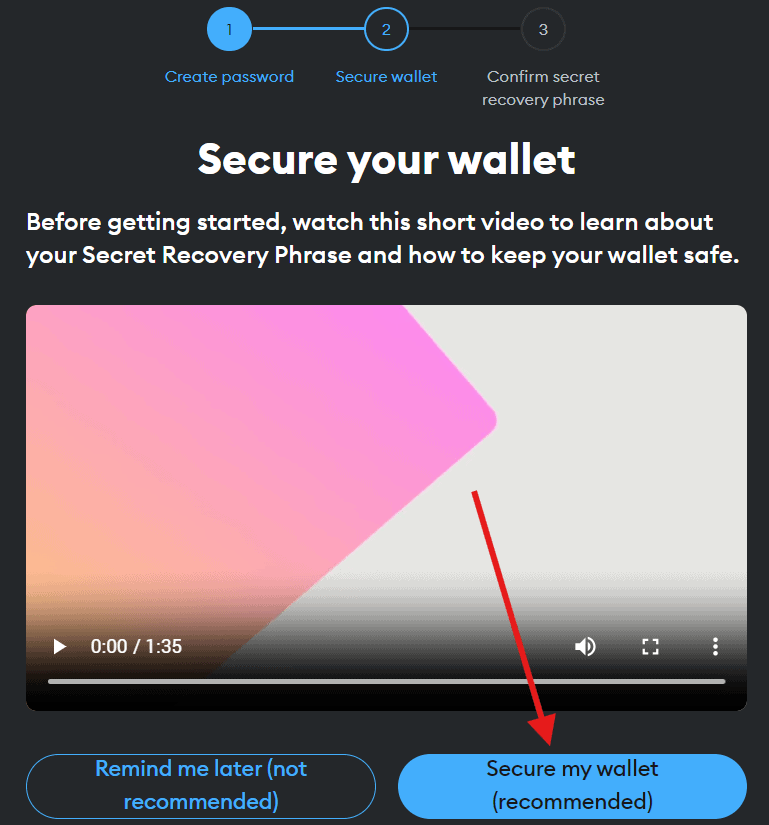
Store the generated phrase on an external digital or physical device and confirm that you’ve acknowledged it, following the on-screen instructions. You can learn more about the purpose of the mnemonic phrase in our review article.
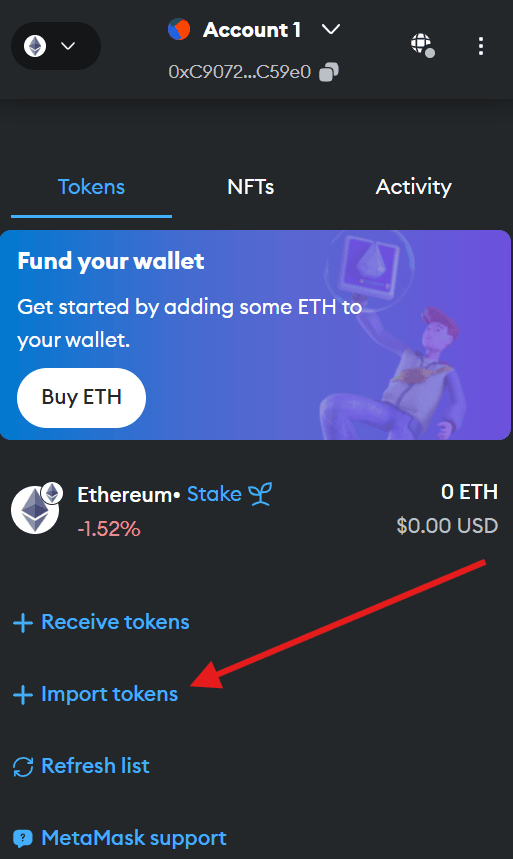
After completing this step, your MetaMask wallet will be ready for use. Initially, only one token — ETH — may be displayed in the interface. To add information about other assets, click Import tokens on the main page and enter the name of the token you wish to add.
How to Send Tokens via MetaMask
MetaMask stands out among competitors with its relatively simple and intuitive interface. To make transactions using the client, you just need to:
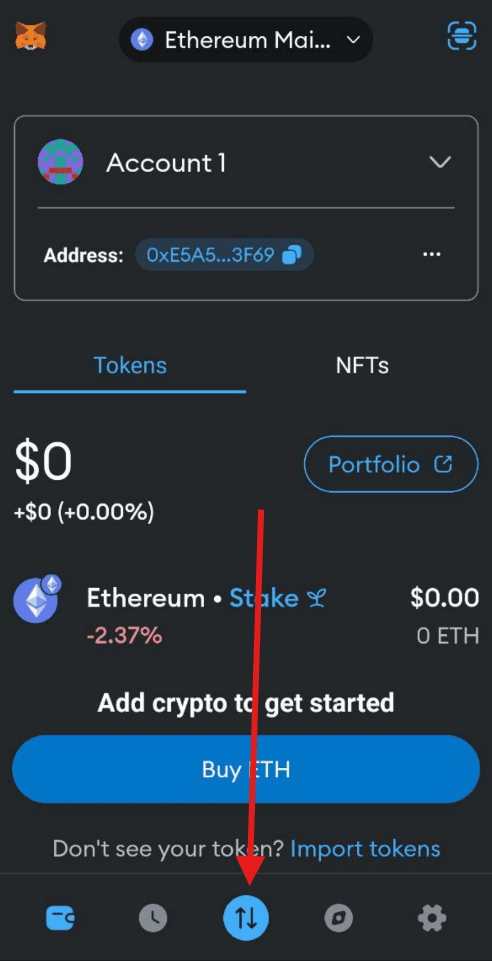
- Select the network and click the central button at the bottom of the screen.
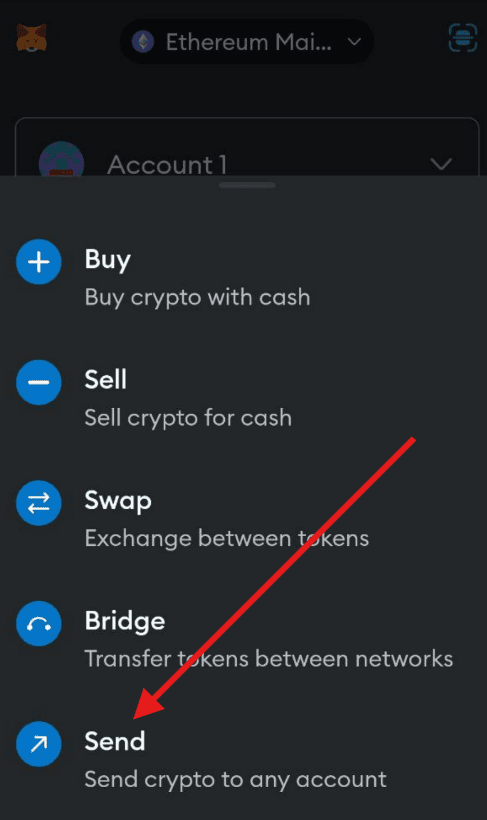
- In the drop-down menu, select Send.
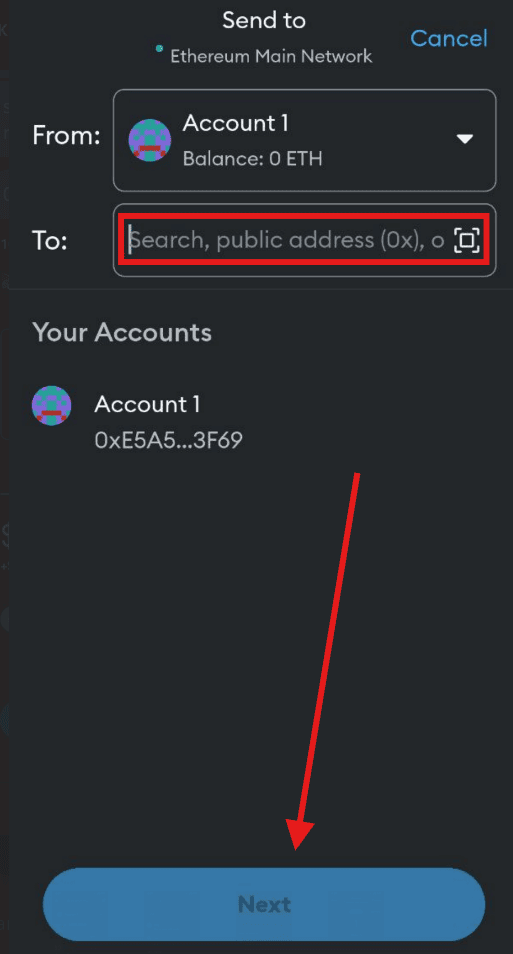
- Then, insert the recipient’s address to whom you want to send tokens and click Next. You can also scan the recipient’s QR code to initiate the transaction.
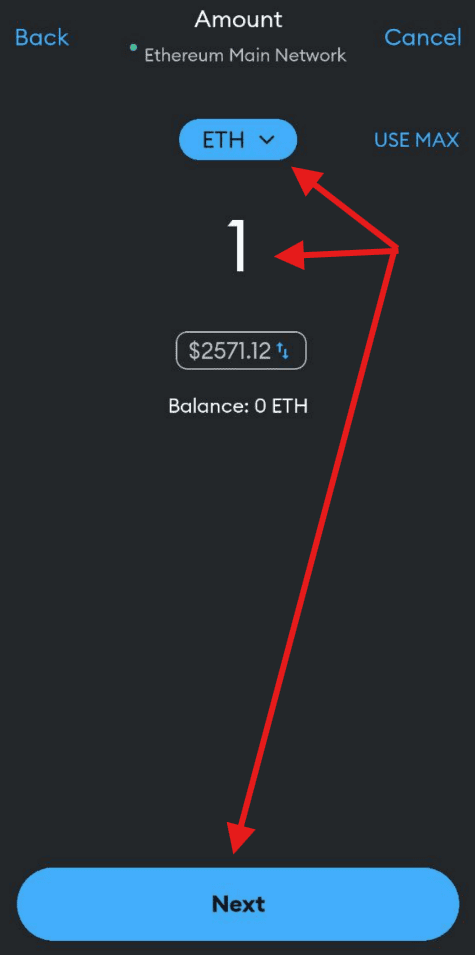
- Specify the asset and the amount to send, then click Next.
After that, you need to review the details and confirm the transaction. The transaction fee is set automatically, depending on the chosen network and its load.
How to Fund MetaMask with a Bank Card
MetaMask offers a built-in cryptocurrency purchase service, allowing you to fund your wallet using a bank card. To do this:
- Click the button at the bottom of the screen, and in the drop-down menu, select Buy (for the extension, click Buy on the main screen).
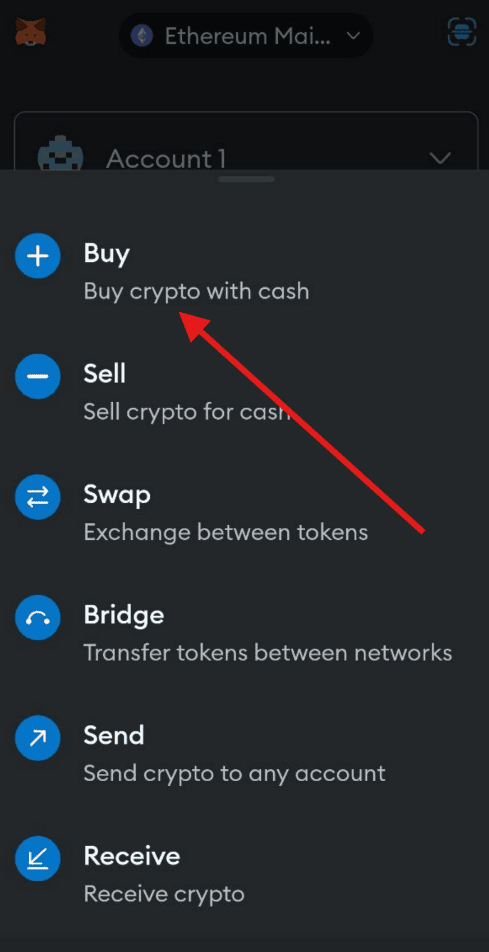
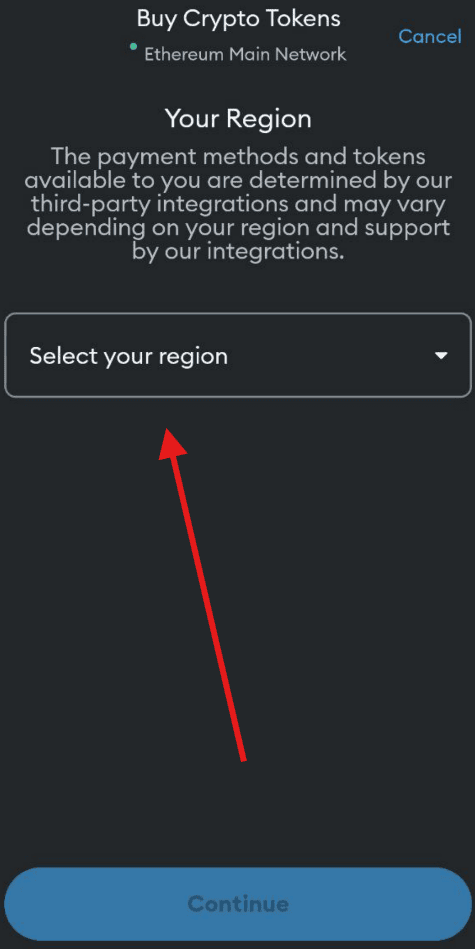
- Then, select your country and a supported payment method. For Ukraine, for instance, bank cards and Google Pay are available.
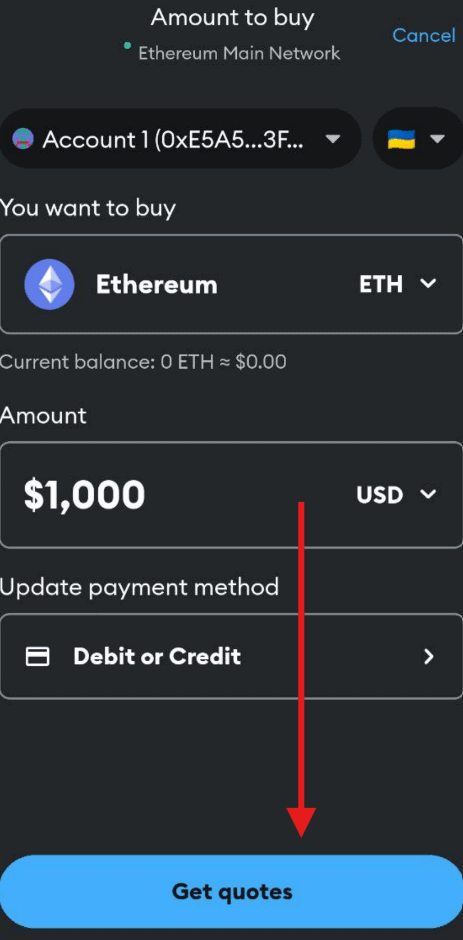
- Choose the digital asset and enter the purchase amount, then click Get quotes.
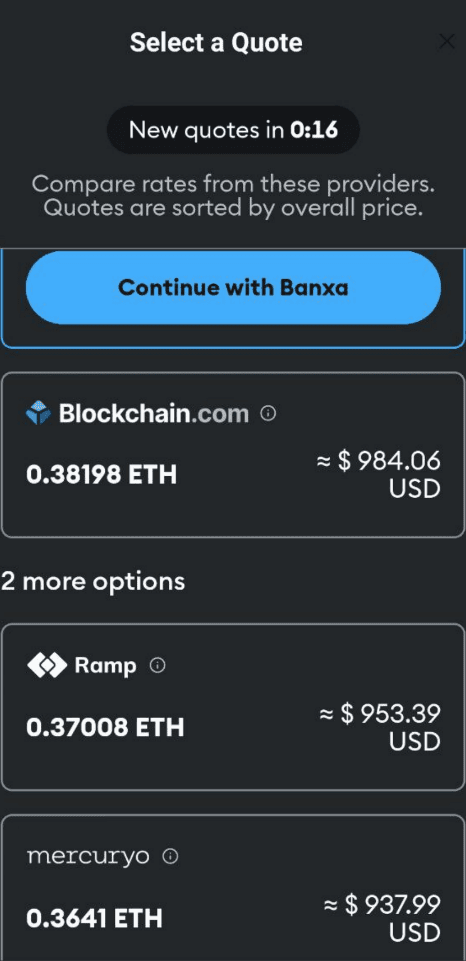
- Next, choose the payment method by which the funds will be debited from the card and the cryptocurrency will be credited to your wallet. Jurisdictional restrictions may apply at this stage. Additionally, most services require verification.
For example, Banxa does not support funding MetaMask via bank cards in Ukraine. Other options include payment through Blockchain.com, Ramp Network, and Mercuryo.
- On the selected payment platform, enter your card details and confirm the transaction in your banking app.
You can also fund your wallet using exchange services, P2P platforms, or by transferring funds from an exchange address.
How to Use the Wallet in DeFi Applications
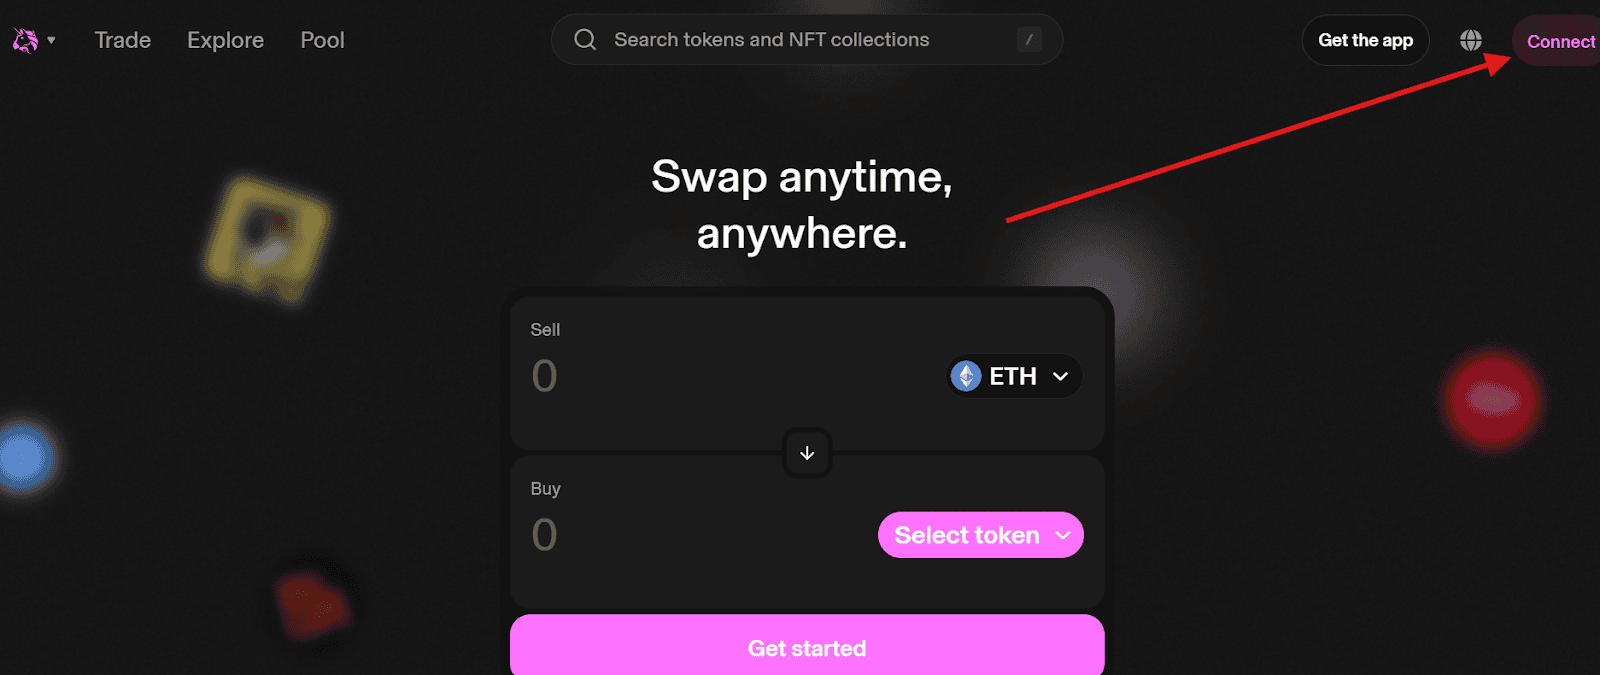
MetaMask can be used not only for storing or sending cryptocurrencies but also for interacting with decentralized finance (DeFi) platforms. For example, to connect the MetaMask browser extension to the decentralized exchange Uniswap, you need to:
- Find the Connect button to connect a crypto wallet. Most DeFi services have a similar option.
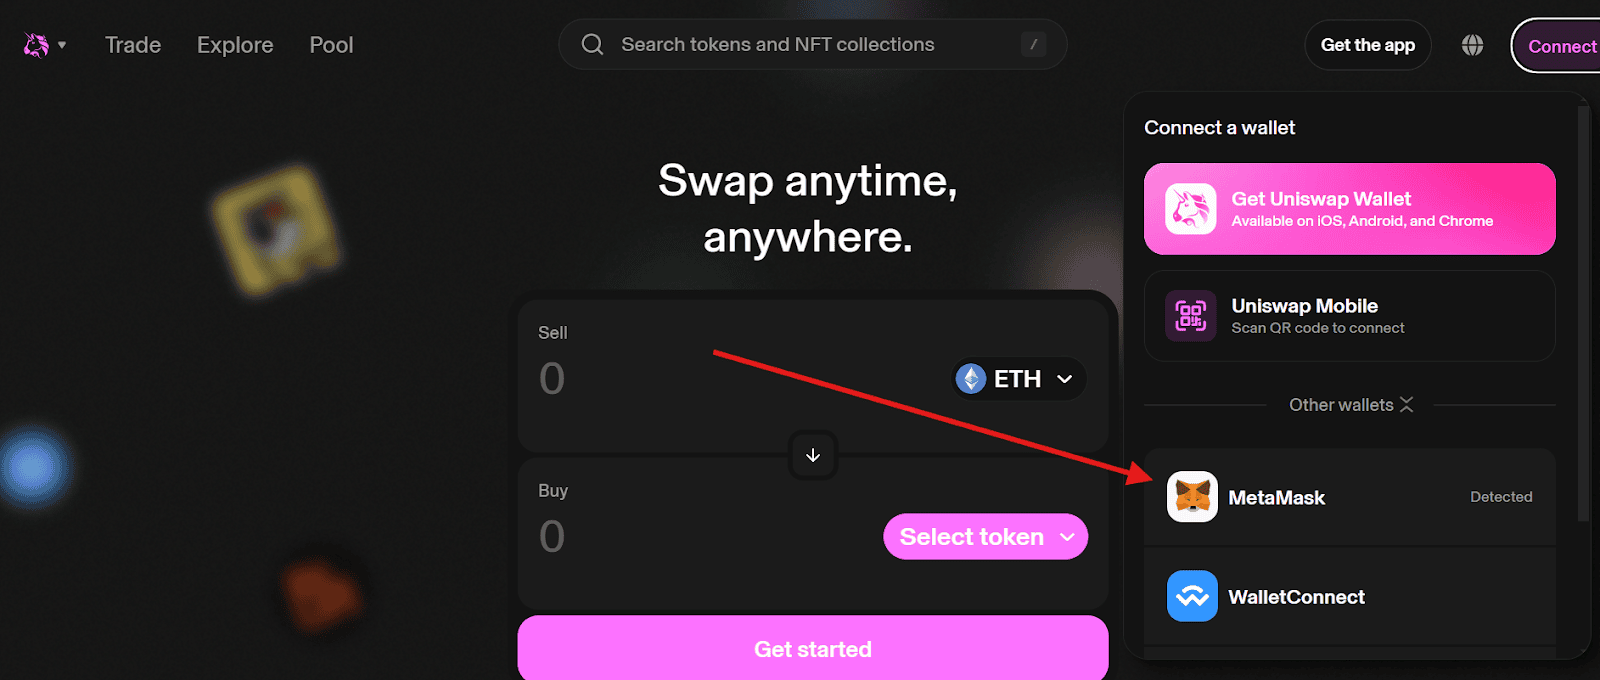
- From the list of available clients, choose MetaMask.
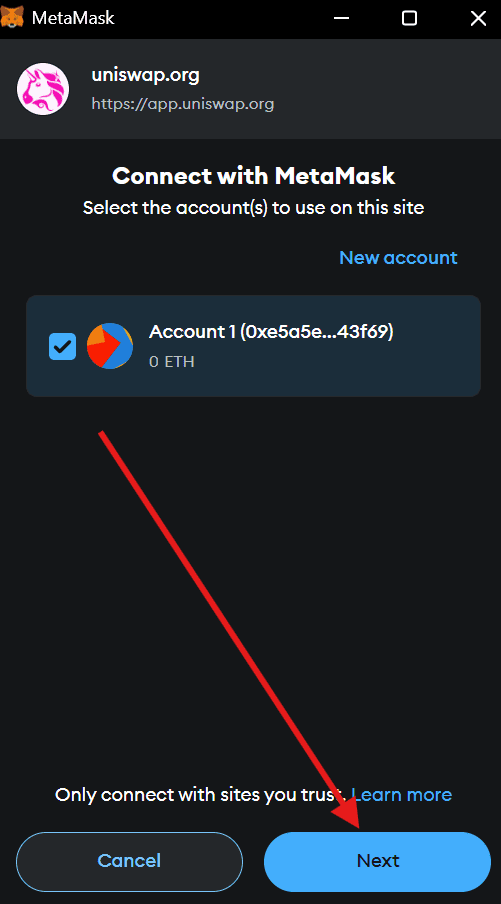
- In the extension or app, confirm the Uniswap smart contract’s permission to access your assets.
Once the wallet is connected, you can perform various operations such as token swaps, providing liquidity, or borrowing assets on DeFi platforms.
The permission granted when connecting allows the app’s smart contract to withdraw funds from your wallet, so do not connect your address to services whose security and authenticity you are unsure of. You can check connected platforms and revoke permissions using the Revoke.cash website.
Additional Features of MetaMask
As it evolves, MetaMask is becoming a multifunctional tool that, aside from serving as a wallet, provides several other products and services to users:
- MetaMask Portfolio. A web app that allows you to view wallet balances directly in the browser. Through this service, you can track tokens across various networks and perform operations with them.
- MetaMask Bridge. Allows transferring cryptocurrencies between different blockchains.
- MetaMask Snaps. Offers the ability to integrate third-party modules into the wallet, such as support for more blockchains or enhanced transaction security.
- MetaMask Swaps. Enables token swaps directly within the wallet. The service aggregates data from decentralized exchange aggregators to offer the best prices and optimize network fees.
- MetaMask Smart Transactions. Provides access to a virtual mempool where you can simulate transactions beforehand to protect against MEV bots and optimize fees.
Additionally, in April 2024, the developers introduced a service to check for available airdrops on blockchains like Ethereum, Optimism, Arbitrum, Base, Zora, and Polygon.
This makes MetaMask a convenient platform for exchanging and storing assets and interacting with DeFi. In the future, users may have access to even more features for working with Web3 platforms.
How to Transfer Cryptocurrency Between Networks
How to Transfer Cryptocurrency Between Networks
To transfer tokens or cryptocurrencies between networks, you can use the built-in MetaMask Bridge function. To do this:
- Open the MetaMask app or extension and select the Bridge option from the main menu.
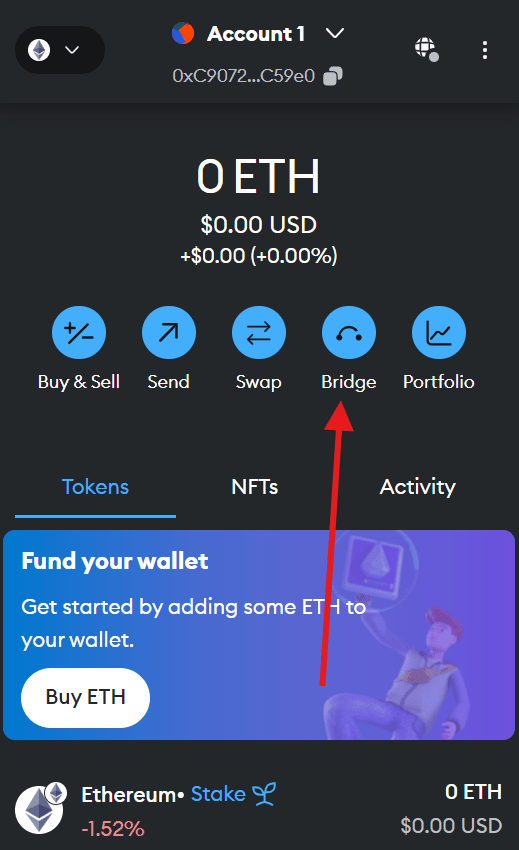
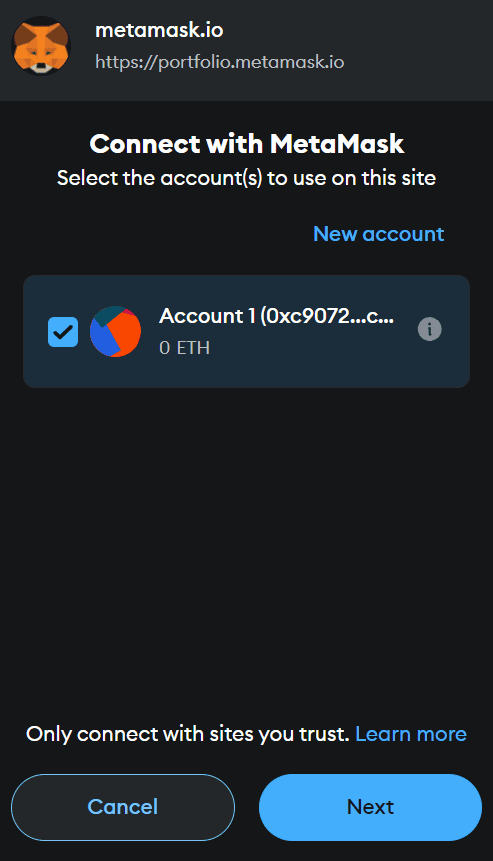
- The app will direct you to the MetaMask Portfolio service, where you need to connect your wallet, as shown in the Uniswap example above.
- Choose the network you want to transfer assets from and to. Then, specify the token and transfer amount. MetaMask will automatically select the best route for the transfer, taking into account the fee cost and other parameters.
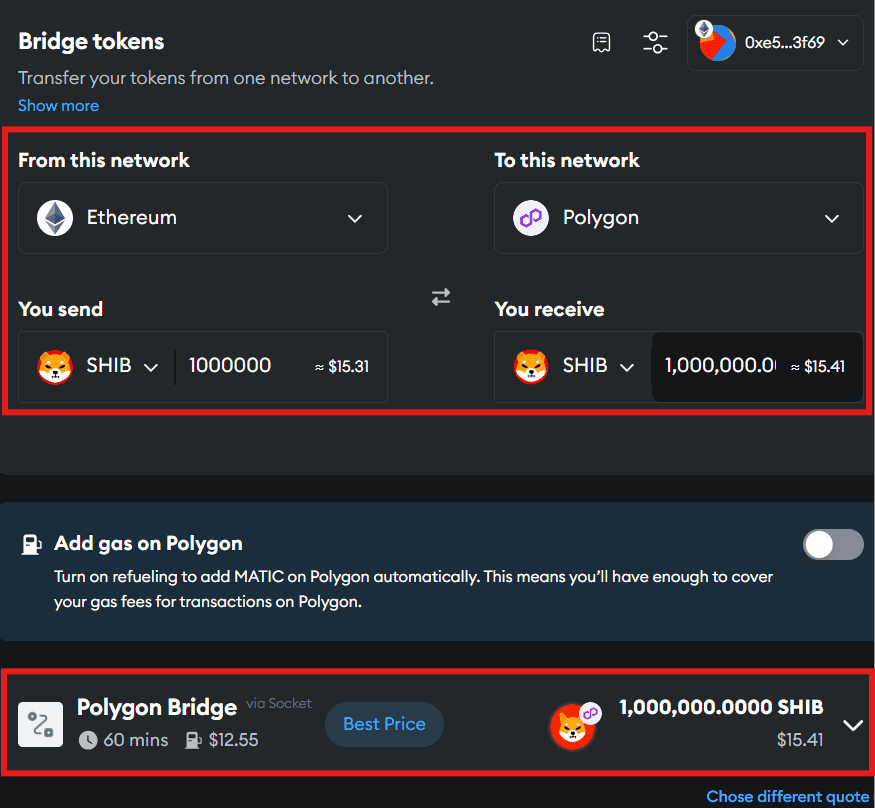
After confirming the transaction and processing it, the assets will be credited to your balance in the target network.
It’s important to note that MetaMask does not have its own cross-chain infrastructure, instead using third-party provider solutions to serve clients.
What Are the Drawbacks of MetaMask?
The primary risk of using MetaMask or similar solutions is the possibility of phishing attacks, where fraudsters attempt to steal a user’s personal information or seed phrase.
Another risk is related to vulnerabilities in the code or browser extensions, which could be exploited to steal assets or disrupt the app. Although developers constantly improve the security aspects of the product to protect it from new hacking and fraud methods.

